How to Use Ubuntu Boot Repair to Fix Boot Problems?
Whether you’re a newcomer or a seasoned Ubuntu user, dealing with boot problems can be frustrating. In this guide, I’ll delve into troubleshooting steps that you can use to address common Ubuntu boot issues.
Ubuntu, a popular Linux distribution known for its user-friendly interface and stability, sometimes encounters boot issues that can leave users scratching their heads. Fortunately, Ubuntu Boot Repair emerges as a beacon of hope, offering a robust set of tools and functionalities to tackle these frustrating boot-related issues.
What is Boot Repair?
Boot-Repair is an open-source tool designed to fix boot-related problems in Ubuntu and other Linux distributions. It helps in repairing the GRUB bootloader, correcting boot configurations, and addressing various boot issues caused by software conflicts, corrupted files, or misconfigured settings.
Features of Boot Repair include:
With boot repair, you can easily perform the following actions:
- Backup partition Tables, boot sectors and logs.
- Reinstall GRUB.
- Backup and rename Windows EFI files.
- Restore EFI Backups.
- Unhide the Boot Menu.
- Repairs file systems.
- Upgrade GRUB.
- Add Kernel options.
- Reinstall the last kernel.
- Edit the GRUB configuration file.
And some other features that help to solve boot problems in Ubuntu.
Booting Ubuntu from USB
Since you can’t boot into your Ubuntu system, you’ll need to boot into a live system in order to install boot repair and troubleshoot the boot problems.
To boot into a live environment, you need to prepare a bootable Ubuntu USB drive. I’ve written a guide on how to make a bootable Linux USB, you can check that out if you need help.
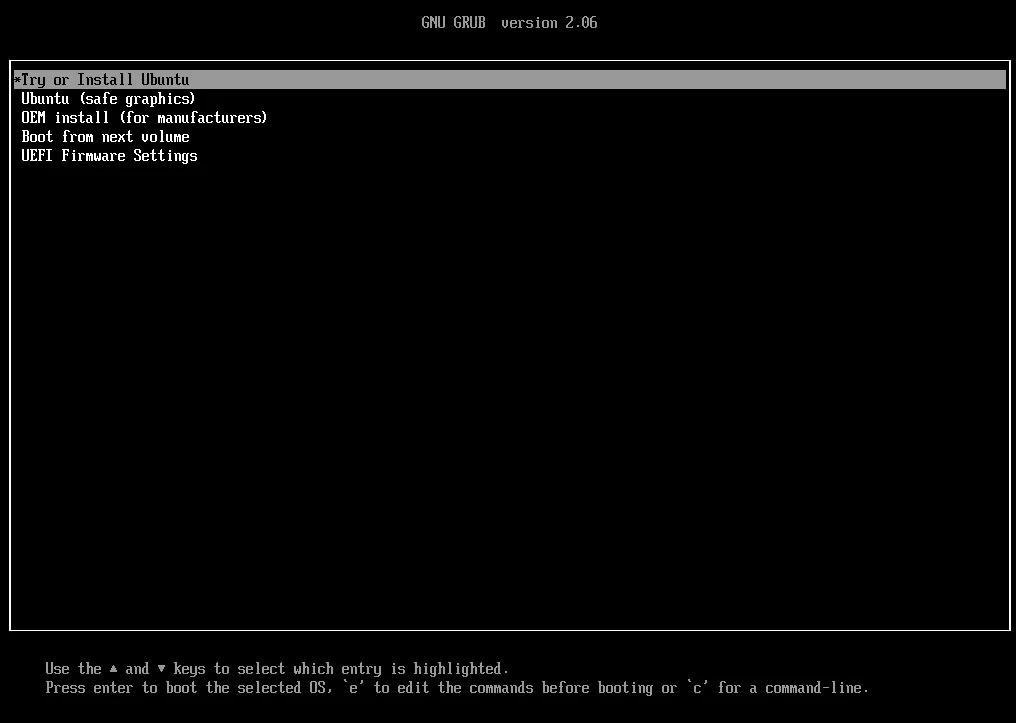
To fix the Ubuntu boot problem, insert the bootable USB on the system that has boot problems. After booting from the USB stick, select the “Try or Install Ubuntu” option from the GRUB menu.
On the Ubuntu Installer screen, select the “Try Ubuntu” option.
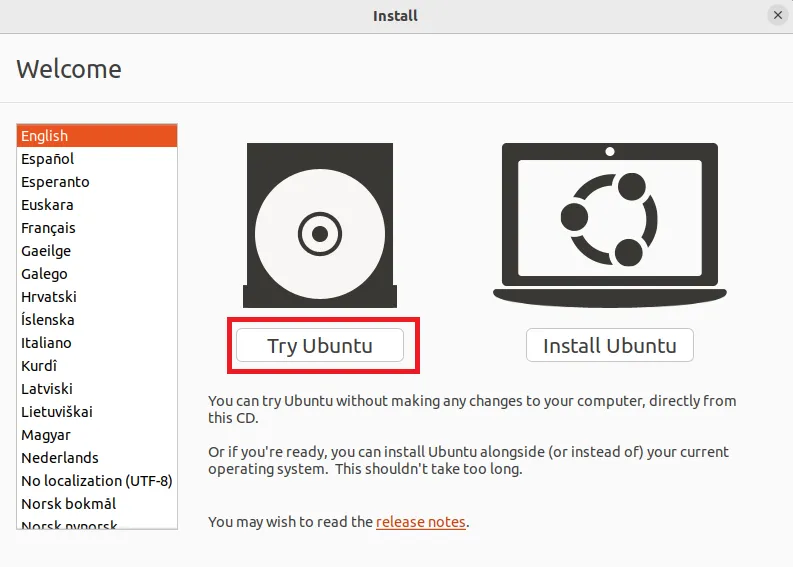
Now, you can install boot-repair on this live environment.
Installing Boot Repair on Ubuntu
On the live Ubuntu, open a terminal and follow the below-mentioned steps to install boot repair.
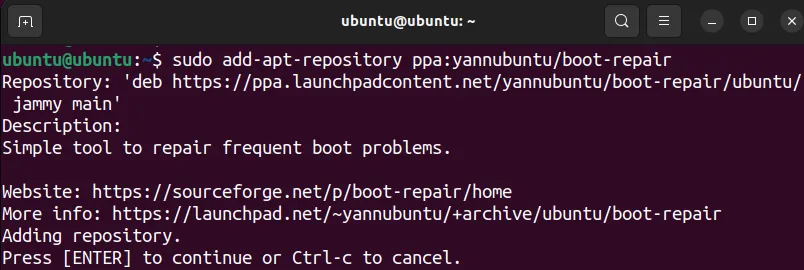
1. Boot repair is not available in the Ubuntu official repository. To install it, you’ll need to add the required PPA repository using the following command:
sudo add-apt-repository ppa:yannubuntu/boot-repair
(Hit enter to continue when prompted.)
2. After adding the PPA repository use the following command to update the repositories:
sudo apt update
3. Now, you can install the boot-repair using the command:
sudo apt install boot-repair -y
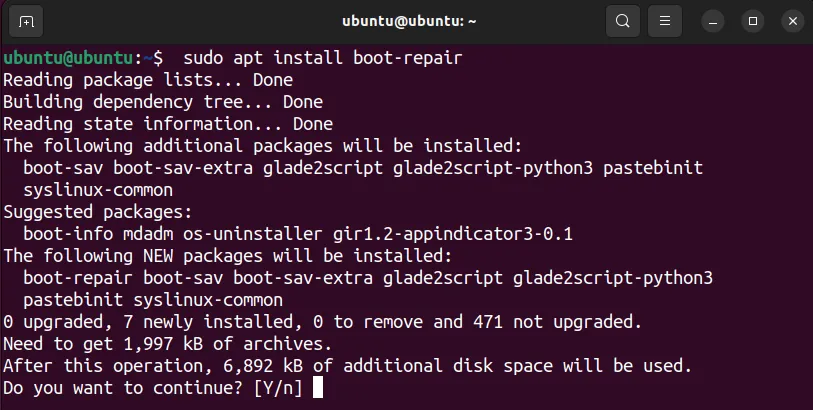
4. Once it is installed, you can start boot repair either graphically via the applications menu or using the following command in the terminal:
boot-repair
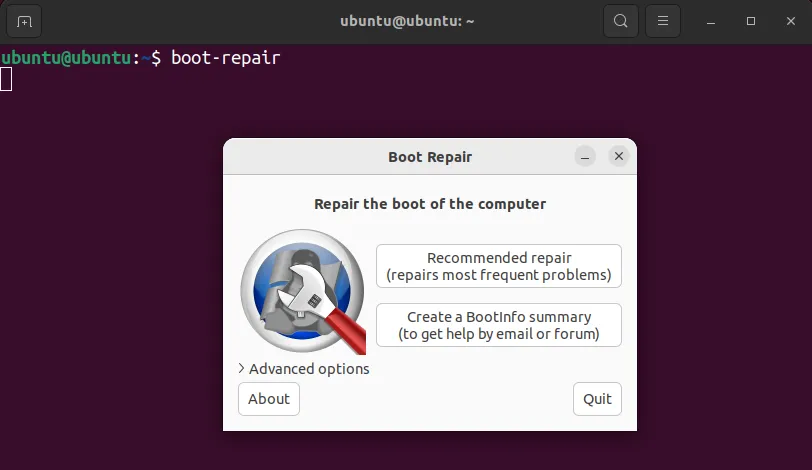
It might take a few seconds to get to the boot repair screen, as it will scan your system first. So be patient.
Using Ubuntu Boot Repair (Recommended Repair option)
Once the Boot Repair is started, you can try the “Recommended repair” option to let it troubleshoot some of the most common boot problems.
It will take a few minutes to scan and troubleshoot the boot problems on your Ubuntu system.
Once it’s done, you’ll be prompted with an option to upload the report to Pastebin. You can do so if you want by clicking the “Yes” button. It just makes it easier to share the problem with other online members when asking for help if things don’t work out correctly.
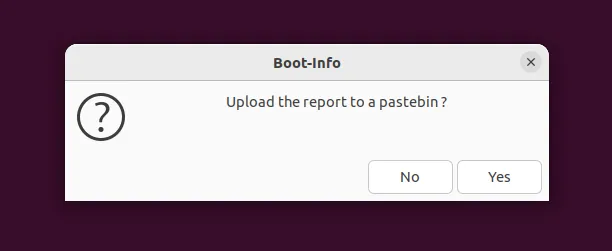
You’ll also see a boot repair text report that includes the system information. Once you go through that you can close it and reboot to your Ubuntu system to check if the boot problems are resolved.
Using the Advance Boot Repair option in Ubuntu
There’s also an advanced options menu in the Boot Repair. You might have noticed it when you started the boot repair utility. If you click on that you can view all the advanced options available to you to fix the Ubuntu boot problems.
There are five main tabs in the Advance boot repair, I will go through them one by one, giving you an insight into the options you will find in each tab.
Important: If you’re unsure about any option or encounter difficulties, it is recommended to seek guidance from the Ubuntu community forums or professional support.
The main options of the Boot Repair
On the main options tab, you will find a button to backup partition tables, boot sectors and logs. You should do that before attempting anything else.
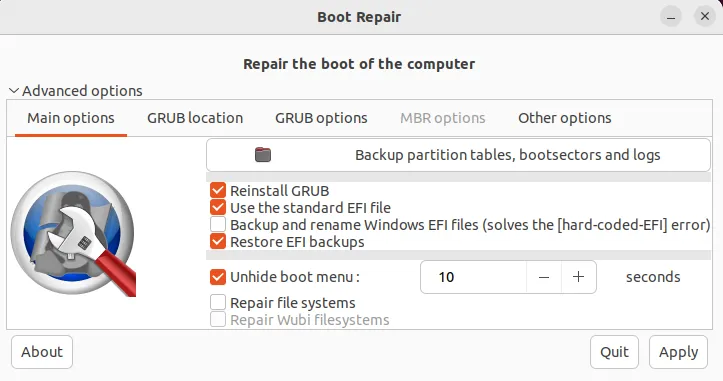
If you wish to reinstall GRUB or repair file systems, then all you have to do is mark the appropriate options and click on the “apply” button. If your Ubuntu system is not booting due to GRUB or filesystem-related issues, then these options will probably solve the issue.
Change GRUB Location
Changing the GRUB (GRand Unified Bootloader) location using Boot Repair can be useful when you want to relocate the bootloader or if you’re encountering boot issues related to its placement. Boot Repair simplifies this process by providing an easy-to-use interface with the “GRUB location” Tab.
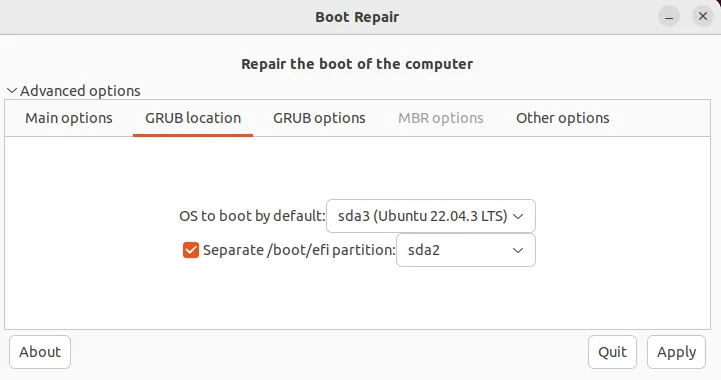
Here you can select the OS to boot by default (if you have a multiboot system) and a separate /boot/EFI partition by just selecting the values using a dropdown menu.
Change GRUB Options from Boot Repair
You can modify several GRUB settings from this tab. The options include: reinstalling the last kernel, upgrading GRUB, adding a kernel option and editing the GRUB configuration files.
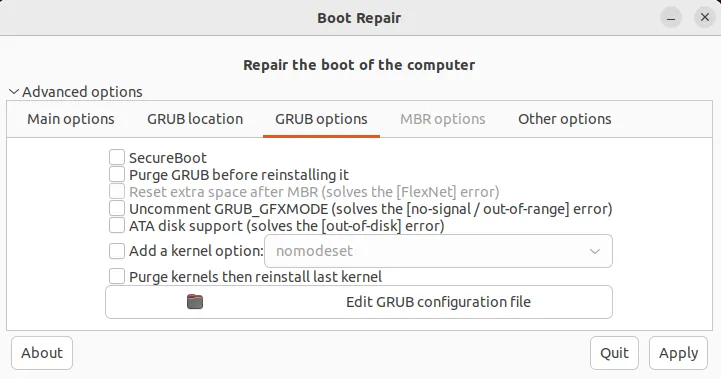
This tab might not be suited for beginner Linux users. You will need some knowledge about the Linux kernel and bootloader for adding kernel options and editing GRUB configuration files.
Changing MBR options in Boot Repair
The MBR options tab contains options to select the partition of which you wish to restore the MBR and also select the partition booted by the MBR.
If you are seeing a blank screen, then these options are not available to you, since your system is not using the MBR.
Repairing Windows boot files using Boot Repair
The last tab (other options) contains options to repair the Windows boot files, check the internet connection and upload the report to Pastebin for easy sharing.
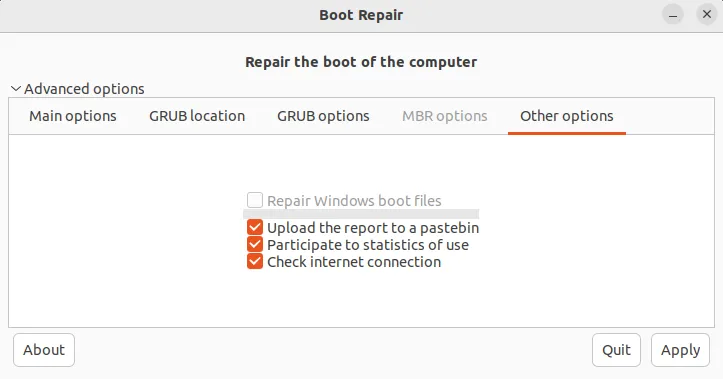
If you wish to repair Windows boot files, then check the appropriate option and click on apply.
Conclusion
In conclusion, utilizing Ubuntu Boot Repair stands as a pivotal solution for resolving diverse boot-related issues encountered within the Ubuntu operating system. With its user-friendly interface and a suite of powerful tools, Boot Repair simplifies the process of diagnosing and rectifying problems that hinder the system’s booting process.
As you have seen, this tool offers an array of functionalities, including automated repairs, GRUB bootloader reinstallation, configuration adjustments, and filesystem checks. The “Recommended Repair” feature serves as a valuable automated solution and will probably be enough for most users to address common boot issues.
Moreover, Boot Repair’s ability to generate detailed reports through the “Create BootInfo summary” option empowers users with comprehensive insights into their system’s boot configuration, aiding in more informed troubleshooting efforts.
I hope now you are able to solve the boot problems using the boot repair tool. You can share your views about this tool in the comments.
If you like this post, then follow CenturyBuzz on Facebook and X (Twitter) for more reviews, tips and tutorials.


